No products in the cart.
How to Get Started
Introduction to the World of FPV
What is FPV?
Virtual Reality & RC Combined
The RC hobby has been around for decades as a way to experience what it's like to drive or pilot smaller scale versions of popular vehicles. But with FPV technology, getting the full experience is closer than ever.

Barrier to Entry
Just like videogames, there is a learning curve to getting started in FPV, but jumping right in with top level equipment and vehicles can make the hobby very expensive as you make mistakes. At EMAX, our goal is to simplify the process as easily and as accessibly as possible to get anyone into the joys of FPV.

How FPV Works
01
Radio Controller
You'll need a radio controller in order to control your RC vehicle. The majority of modern radios run on 2.4GHz as it offers great reception, penetration, and minimal latency.
02
Wireless Zero-Latency Video
Most FPV systems operate on a 5.8GHz band, very close to 5GHz Wi-Fi. This band offers high quality analog video with Minimal-Latency in order to offer the most immersive experience possible.
03
Vehicle Of Choice
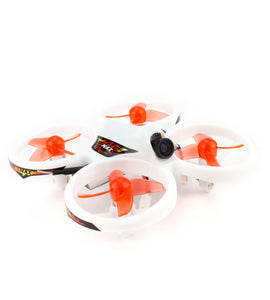
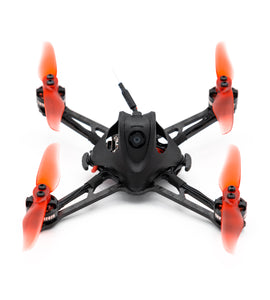
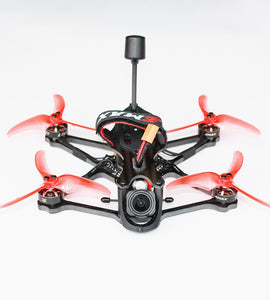
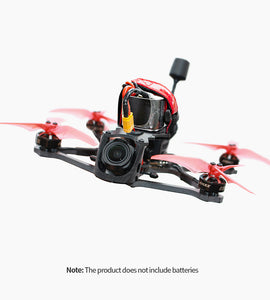
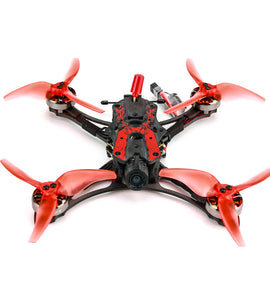
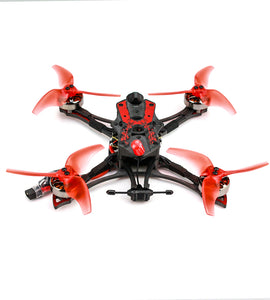
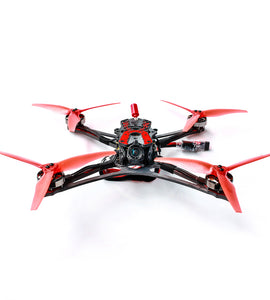
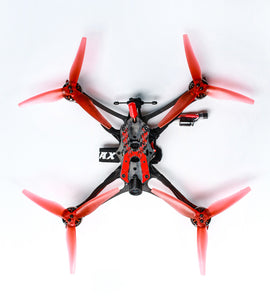
You can install a FPV system onto practically anything, but the most common choice would be quadcopter drones. Drones are mechanically simple and durable, able to withstand abuse while offering a Bird's Eye View of your surroundings. Paired with acrobatic performance, pilots will feel as if they are piloting a fighter jet.
Getting Started
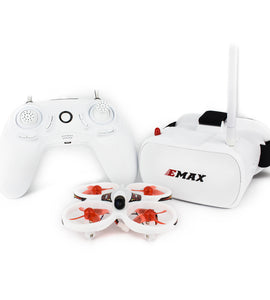
Level 1 - EZ Pilot
Looking to step up to your first flying experience? The EZ Pilot is an all-encompassing drone for first time pilots. It features altitude hold so pilots only need to set the height they wish to fly at and cruise around. Also programmed into the drone is a One-Stick-Control beginner mode. After taking off and having your height set at a comfortable level, you can cruise around just moving the right stick on the controller instead of having to manually adjust all aspects of the drone on a traditional two stick mode.

Beginner
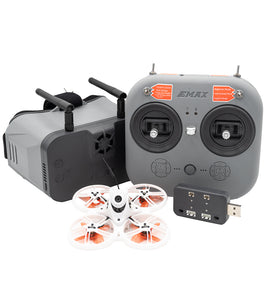
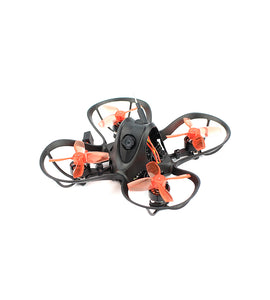
Level 2 - Tinyhawk Lite
The Tinyhawk Lite is EMAX’s most affordable entry into the Tinyhawk lineup, designed for new pilots who want a simple and budget-friendly way to start flying FPV while still using the industry-standard Betaflight firmware. Built on a lightweight 75mm micro whoop platform, the Tinyhawk Lite offers stable indoor flight, durable prop guards, and responsive control that helps beginners develop real FPV skills. Equipped with a RunCam Nano 3 camera, adjustable analog VTX power, and a 1S power system, it delivers a smooth and approachable flying experience that can grow with the pilot as they learn tuning and customization in Betaflight.

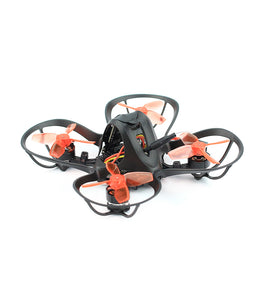
Level 3 - Tinyhawk III Plus
You have some experience piloting a drone and looking for a performance indoor racing drone to learn on? The Tinyhawk III Plus offers unparalleled performance, aerodynamics, and durability to learn acrobatic flight as well as compete in "whoop class" competitive racing. Features 3 modes to help pilots graduate from basic gyroscopic level flight to professional "Rate" mode with no gyro leveling assistance.

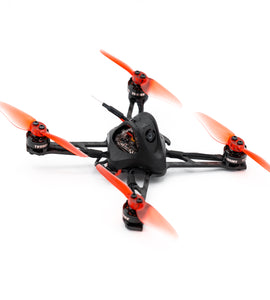
Level 4 - Tinyhawk III Plus Freestyle
If you have experience flying drones outdoors, the Tinyhawk III Plus Freestyle offers a platform to grow and excel with outdoor acrobatics. With excellent power-to-weight ratio backed by performance and flight time, the drone will allow a large amount of forgiveness with mistakes when practicing tricks or racing. Backed with 2s performance, this is the most difficult beginner drone to start with and is best for those with some previous experience looking to level up their skills.
Comes with everything you need to get started, from a controller, FPV goggle, Tinyhawk III Plus Freestyle drone, batteries, and charger.

Intermediate
Level 5 - Tinyhawk Nanoscout
If you're looking to level up your indoor racing performance, the Tinyhawk Nanoscout is the smallest and lightest of EMAX's offering and offers an unparalleled power to weight ratio. This makes the Nanoscout have extreme performance on 1s, pushing the limits of nano sized drones. For flying indoors, we wouldn't recommend it for a first time beginner but someone in the transition to intermediate. Comes with everything you need to get started, from a controller, FPV goggle, Tinyhawk Nanoscout drone, batteries, and charger.

Level 6 - Nanohawk X
The next step up in 1s performance, this small 3" outdoor drone provides plenty of power to practice power loops and acrobatics. With one of our highest power to weight ratios, you will feel the scale of a much larger FPV drone in a small scale. While this product is not for first time beginners, for those with some drone experience, this can be a solid step towards being a first time outdoor racing drone.

Level 7 - Cinehawk & Mini
If you're looking for a drone specifically made for video capturing, the Cinehawk features propeller guards making the aircraft safe around actors or for video use within indoor shooting locations. Using the DJI O3 Air Unit, you can capture 4k stabilized video with the drone itself, or use the cushioned platform with a GoPro adapter to carry other cameras.

Level 8 - Babyhawk II HD or Analog or O3 or O4
For experienced pilots looking to find a capable micro drone for carrying HD payloads while retaining legal restrictions of drones under 250g. Being an all-rounder powered by 4s, this drone will feel right at home for freestyle flights and racetracks. With a DJI HD system, you can capture HD footage right from your FPV goggle while experiencing the best FPV image and penetration the industry has to offer. Optionally is an Analog version for those wanting to experience traditional FPV with their existing gear. Also the newer O3 Air Unit features built-in 4k video with stabilization for a more cinematic use.

Expert
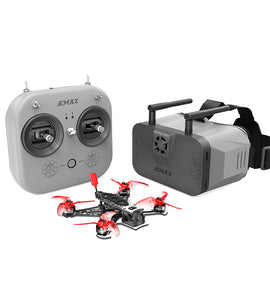
Level 9 - Hawk Apex 3.5"
For experienced pilots looking to race or capture action camera footage, the Hawk Apex provides an affordable platform to meet your needs. Flying a larger 5 inch racing drone is the dream of every pilot when starting out, but should be approached with caution until enough experience is obtained. When jumping to our 3.5 inch drone options, by this point you should have graduated to more specialized equipment for your controller and goggle due to the dangerous nature of a faster racing drone.

Level 10 - Hawk Apex 5"
For serious pilots looking to race or capture action camera footage, the Hawk Apex 5" provides a premium platform to meet your needs. The Hawk Apex features our flagship Power System offering top-of-the-line performance, speed, and efficiency. Where every moment counts, the Hawk Pro meets the demand. Featuring HD Zero and ELRS systems, stable connections and low latency will allow pilots to push harder than ever.

Educational Programs
Drone oriented programs we are partnered with

FPV Unlocked
Online Course
The world's first fully online FPV course teaching you everything you need to know about FPV from beginning to end.

Spire Institute
Sports Bootcamp
SPIRE is committed to unlocking an individual’s full potential. We integrate professional training, education and competition across a wide variety of sports, disciplines and possible career paths.

Camp Flight Control
School Program
We believe that starting with a solid foundation of drone education will allow students to develop the skills for the future and become better informed of the practices and safety required for piloting drones.

Various School Districts
Academy
Brandywine School District
Chester County School District
Loma Linmda Academy
Product Route
What we recommend when exploring FPV


Should You Build A Drone?
Benefits to Building
Pros to Building
01
Know Your Drone
Building a drone teaches you how it works. When it comes to repairing your drone, you'll have an easier time diagnosing issues.
02
Customize Your Drone
When it comes to maximizing your flight performance, every pilot has specific demands on what they look for. Throttle curve, thrust, weight, grip, a custom drone can match all your demands perfectly.
03
Specific Tools
Sometimes your drone has a specific task to perform. Your average racing drone may not be able to carry a larger cinema camera or heavier payload. Sometimes safety features such as ducts may be needed for indoor flying. For niche needs, building a drone may be your only option.
Cons to Building
01
Skill Level
When building a drone, you will need a basic understanding of electronics and be comfortable with soldering parts together and programming your drone with your chosen software.
02
Time
Building a drone can cost you a lot of time. If you're looking to just get into the air, it may be more efficient to purchase a BNF and learn the hobby before taking the deap dive into customing your own aircraft.
03
Costs
Buying quality parts individually generally costs more than purchasing them put together as a BNF drone. Building a lower cost drone can require a lot of experimenting to find the right combo of reliable parts.
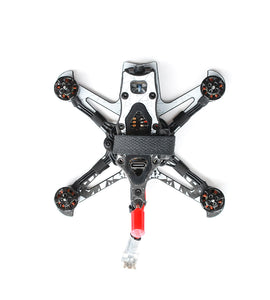
What Makes A Drone
Drone Frame
Before building a drone, you'll want to decide what kind of drone you want to build. Freestyle? Racing? Cinema? There's all kinds of frames and sizes to choose from.

Power System
Based on the frame you choose, you'll need to pick a power system. Choose a motor and propeller combo that generates enough thrust for your frame and payload.
You can learn about Power Systems here:

Electronic Speed Controller
After finding your power system, you will need an ESC in order to control each motor. Every ESC has an Amp rating that you will have to match to your power system. A motor/prop combo that pulls 25 amps will burn out an ESC rated for 10 amps. Some products will use a 4-in-1 ESC board, having all 4 ESCs required for 4 motors on a single board.

Flight Controller
The Flight Controller is the computer running the entire system. You will attach the ESCs to the flight controller so the ESCs will know how to spin each motor. Make sure to pick a controller that will support your chosen software. Some modern Flight Controllers will have 4 ESCs built into the board.

Receiver
The Receiver is connected to your Flight Controller and is what receives commands from your radio. There are all kinds of radio systems with pros and cons, but most modern radios operate at 2.4Ghz. Make sure to look up your local rules and regulations regarding legal bands and transmission power.

Camera
The Camera is what you will be looking through in your FPV Experience. There's all kinds of cameras with different resolutions and settings. Make sure to pick NTSC or PAL depending on your location and that the form factor of the camera fits your drone frame.

Video Transmitter
A VTX is connected to your camera and will send a video signal to your FPV goggle. Make sure to look up your local rules and regulations regarding legal video channels and transmission power.

VTX Antenna
Video Transmitters emit video signals via an antenna. Every antennas has a pro and con to it. Larger antennas tend to offer stronger video signals but can be cumbersome on your aircraft. The key is to find balance.

Lipo Battery
You will need to choose the correct battery that suits your power system, electronics, and drone frame. In this photo, the battery is a 4s (meaning 4 cell) 14.8v (voltage of the system) 850mAH (size of the battery) with a constant discharge rate of 80c (how quickly power can be pulled). A balance of every aspect is key.

Final Drone
Once everything is put together, you will have your final drone, custom suited for your needs.

Quick Soldering Tips
Quality Matters
Don't cheap out on a soldering iron. A poor quality iron can lead to poor soldering and possibly damaging your electronics.

Pre-Tin
Add solder to the tip before you start soldering.

Add Solder First
Pre-add solder to everything you will solder together. After tinning all wires and pads, then you can safely solder parts together without damaging your products.

Finished Solder Point
A finished and well done solder point should be clean, round, and well attached. Be careful not to add too much heat or you can destroy the board, but you'll also want a good amount of heat so the solder flows well.
